Simple activities. Colorful little moments.

Paper Weaving for Kids: An Easy Over-and-Under Craft
Learn paper weaving for kids with wide strips, a simple paper loom and clear over-and-under steps. Includes troubleshooting and beginner adaptations.

Paper weaving for kids is a simple way to turn two colors of paper into a bold patterned picture. The repeated over-and-under movement gives the craft a clear starting point, while the colors and finished design remain a child’s choice. Begin with wide strips and a small paper loom so the first attempt feels manageable.
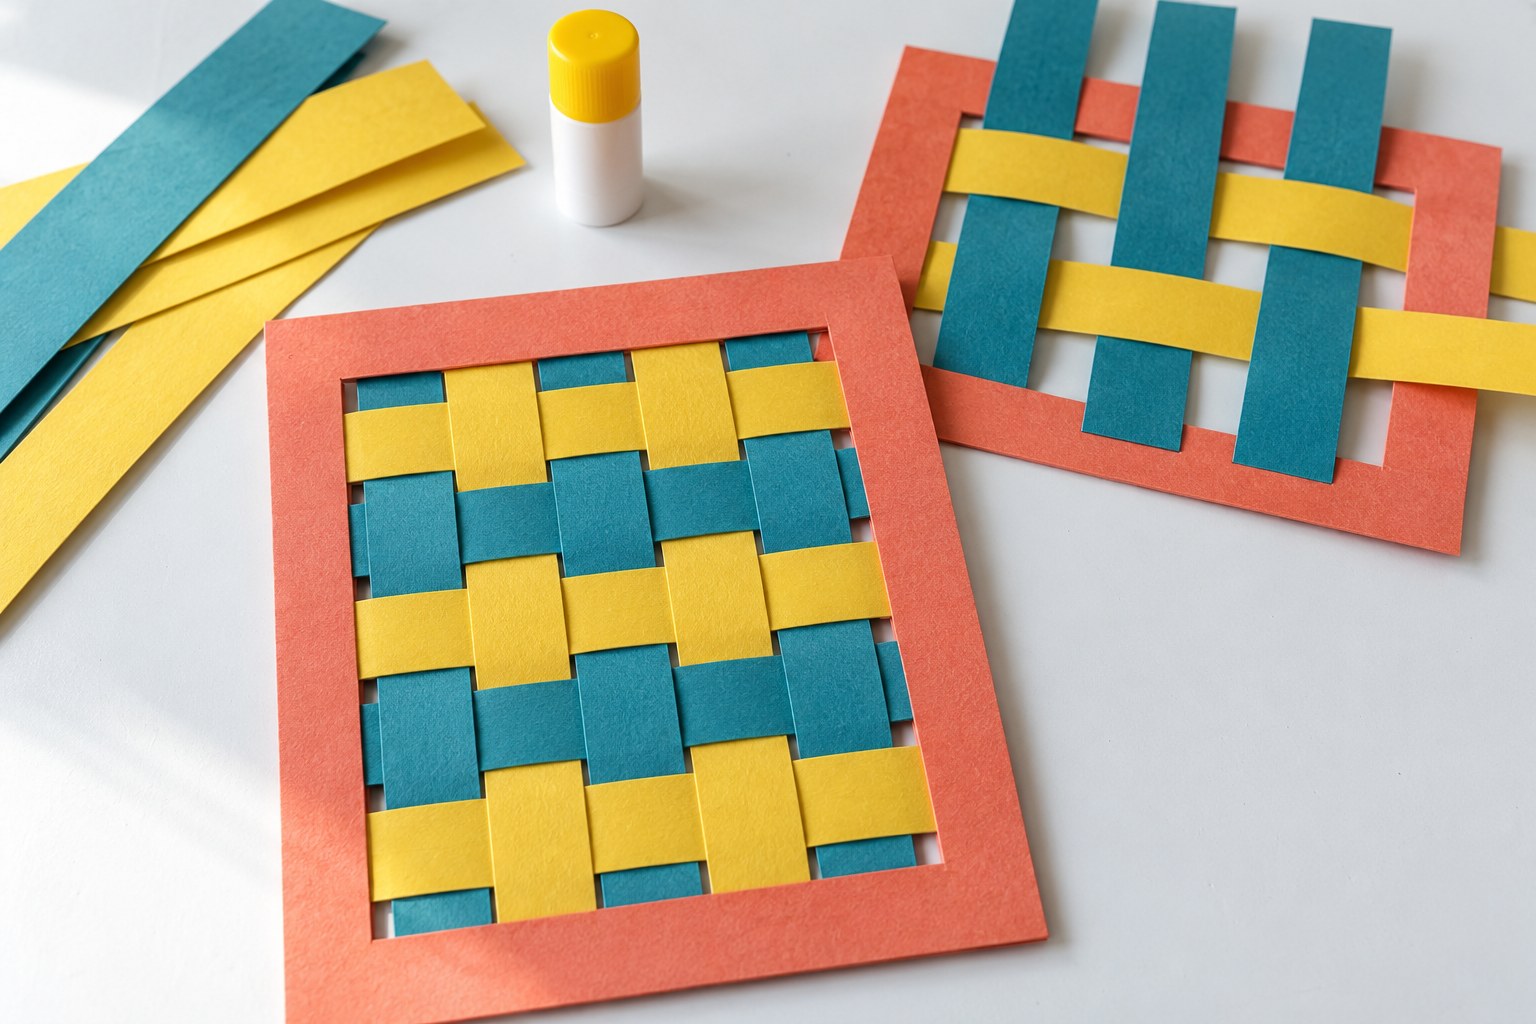
What you need
Gather two or three sheets of colored paper, a ruler, a pencil, child-appropriate scissors and a glue stick. An adult can prepare the loom and strips for children who are not ready to cut them. Ordinary construction paper works well; very thin paper tears more easily, while stiff card can be harder to bend through the gaps.
Allow roughly 15–30 minutes as a flexible starting point, including setup. There is no need to finish in one sitting. A half-woven piece can rest flat on a tray until your child wants to return to it.
Make a simple paper loom
Fold one sheet in half across its short dimension. Draw a stopping line about 2 cm from the open edge. Starting at the folded edge, draw parallel cutting lines about 2–3 cm apart, ending at the stopping line. Cut along those lines, stopping before the outer border. Unfold the sheet: the slits should sit inside an intact paper frame.
Cut a second color into strips roughly the same width as the spaces in your loom. Make the strips long enough to reach beyond both sides of the frame. Exact measurements matter less than having a small number of broad, easy-to-handle strips.
Weave the first two rows
Slide the first strip over one lengthwise band of the loom, under the next, then over and under until it reaches the opposite side. Pull it gently into place without tightening it so much that the frame curls. Leave a little strip showing at each end.
Start the second strip the opposite way: under the first band, over the next, and continue across. Gently push it beside the first row. Alternating the starting position makes the checkerboard pattern. Say “over, under” together if that helps, but pause and point whenever the words become distracting.
Finish and display the weaving
Add rows until the loom is nearly full. Keep a little space for the last strip so it does not need to be forced through. Once the arrangement looks right, use small dabs of glue on the ends to hold the strips against the frame. Trim the extra paper after the glue has set. Display the weaving as a picture or mount it on a folded card; paper weaving is decorative, not a washable placemat.
Fix the common snags
If two neighboring rows look identical, gently remove the newer strip and reverse its starting position. If a strip catches, lift the next band with one hand while guiding the strip with the other. If the paper tears, reinforce the back with a small piece of tape or start again with fewer, wider slits. A slightly uneven pattern still makes a lovely finished piece.
Make it easier or add a challenge
For a first attempt, use just four or five slits and two contrasting colors. Work side by side, taking turns on each row. For a variation, alternate strip colors, try a repeating three-color sequence or compare broad and narrow strips on separate looms. Change one feature at a time rather than adding every challenge together.
Use leftover strips in our torn paper flower collage, or keep them for a future art birthday party station.
Can you weave without scissors?
The loom needs slits, so an adult can prepare it ahead of time. Children can then choose colors, thread the strips and glue the ends without doing the cutting themselves.