Simple activities. Colorful little moments.

Paper Plate Fish Craft for Kids: Cut, Color and Create
Make a paper plate fish craft with a triangle mouth, paper tail and drawn eye. Includes easy assembly, decoration ideas and fixes for loose fins.

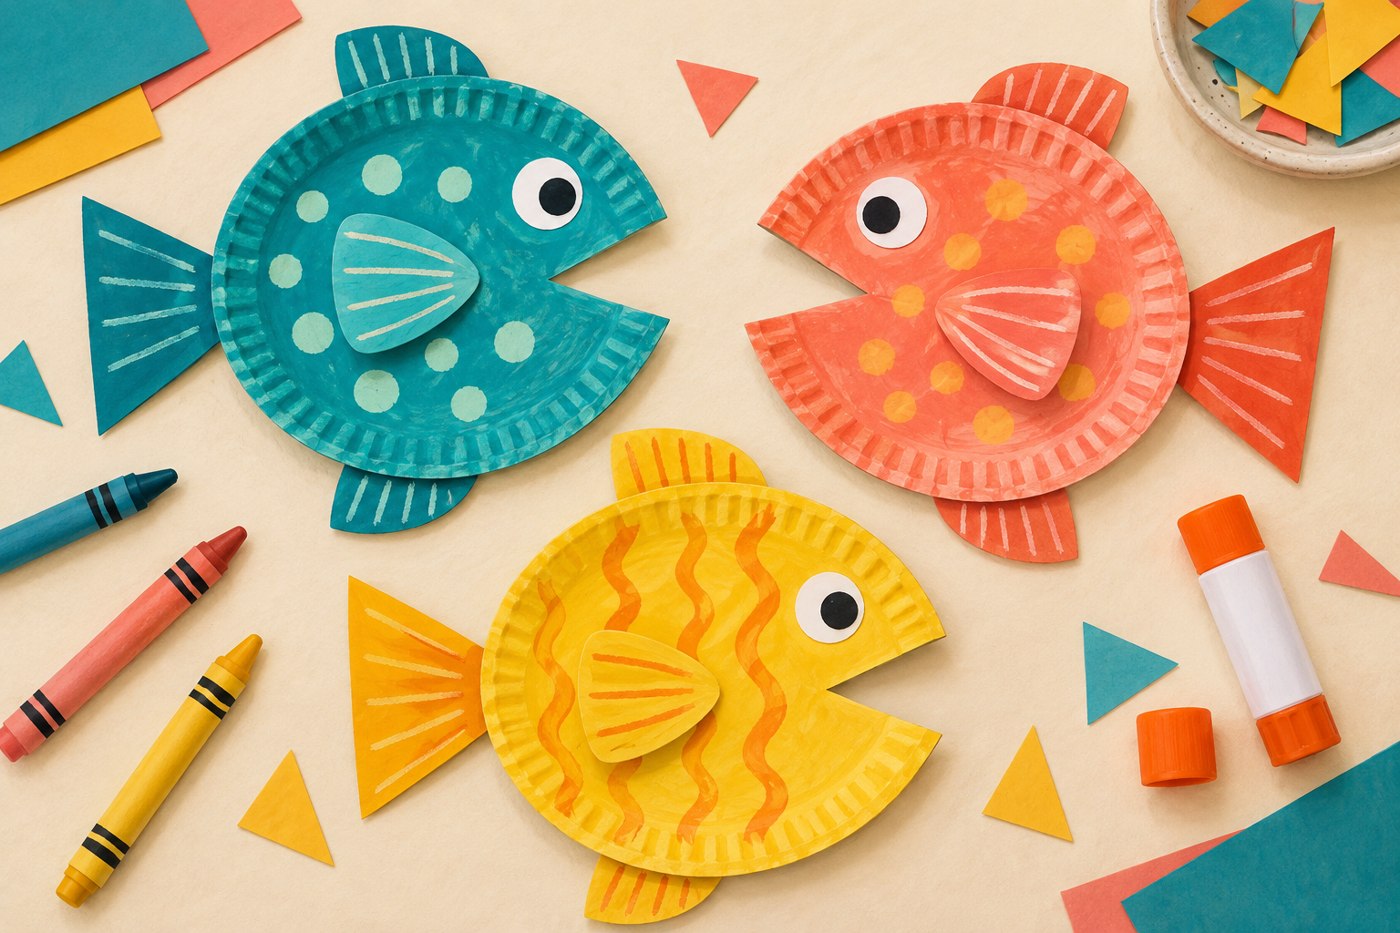
A paper plate fish craft turns one familiar round shape into a character with a mouth, tail and fins. This version uses crayons and a glue stick, so there is no paint-drying stage. Make one fish first, then decide whether to build a whole paper aquarium. The finished fish is a flat collage, not a toy for water.
Choose a plate and a simple supply kit
For one fish, gather an uncoated paper plate, a small sheet of colored paper, crayons, a glue stick, tape and child-appropriate scissors. Draw the eye rather than adding a small plastic eye. An adult can handle the cutting if the plate is stiff or the child would rather concentrate on decorating.
A plate around 18–23 cm wide gives plenty of drawing space. A clean cereal-box circle works if you have no plate. Set aside approximately 20–30 minutes, with no need to fill the whole time if the child is finished sooner.
Cut a small mouth and position the tail
Draw a narrow triangle with its point facing the plate’s center and its wide edge along the rim. Cut out this wedge to create the open mouth. Keep the opening small enough that most of the circular body remains intact.
Use the removed wedge as a tail by placing its point behind the opposite edge of the plate, with the wide end pointing outward. A separate paper triangle is easier to attach when the plate wedge is thick or curved. Try the position before gluing: the tail should sit opposite the mouth, not directly underneath it.
Color the body before attaching extra pieces
Lay the fish body flat and color it with large patches, stripes or dots. Crayons may catch on the raised plate rim; that texture can become part of the design. A child who dislikes the ridges can use the smooth reverse side or switch to a cardboard circle.
Add a large drawn eye above the mouth. Realistic colors are optional. Ask the child to choose one repeated mark, such as wavy lines or circles, if they want a starting idea. Leave plain areas rather than requiring every white patch to be filled.
Attach the tail and two broad fins
Glue an overlapping section of the tail behind the body and press it firmly. Reinforce the back with a short piece of tape if the plate surface resists the glue. Add a broad paper fin above and another below, or use just one side fin on the front.
The illustrated fish have extra decoration, but the basic mouth, tail and eye are enough to make yours recognizable. Avoid narrow tabs that tear when handled. If a piece keeps falling off, increase the overlap instead of adding more layers of wet glue.
Build a shared paper aquarium
Arrange the finished fish on a large sheet of blue paper without gluing them down at first. Leave open water between them and draw a few plants along the bottom. Invite each child to choose where their fish swims; a group display works without identical fish.
For pretend play, move the fish by holding the plate body rather than pulling the tail. Give each one a name and describe where it is going. A simple story might follow a striped fish looking for a quiet place among the paper plants.
Adapt the activity and save the scraps
For a shorter session, offer a precut body and tail. For a child who wants more drawing, leave the plate uncut and let a drawn mouth do the work. There is no requirement to practice cutting and coloring in the same session.
Save broad paper scraps for our paper mosaic collage, or try accordion paper animals for a craft that uses folding. Keep finished plates flat until the joins are secure.