Simple activities. Colorful little moments.

Paper Strip Rainbow Craft: Make a Standing Paper Arch
Make a standing paper strip rainbow with five measured strips. Follow the folding and gluing steps, plus easy fixes for arches that lean or flatten.

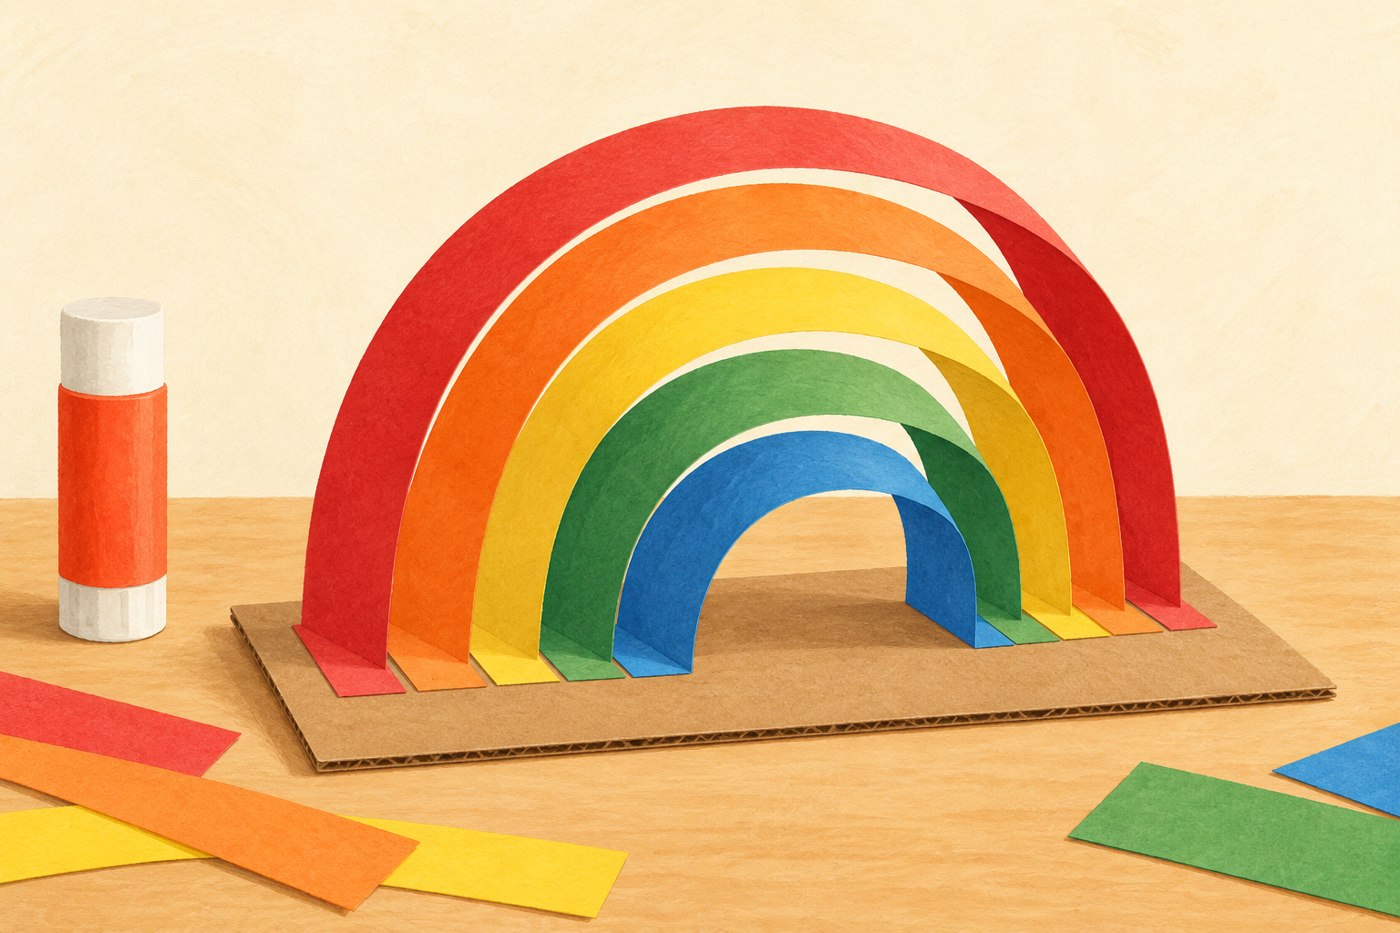
This paper strip rainbow craft stands on its own cardboard base. Five strips of different lengths become nested arches, so the project is as much about arranging and adjusting as decorating. It uses ordinary colored paper and a glue stick, with no paint or drying rack required. Plan about twenty minutes, plus time for the glue to hold.
Cut strips that can nest
Gather colored paper, a ruler, pencil, glue stick, child-appropriate scissors and a piece of thin cardboard approximately 18 by 12 centimeters. An adult can cut the strips in advance. Make five strips, each 2 centimeters wide, with lengths of 26, 23, 20, 17 and 14 centimeters.
Use red, orange, yellow, green and blue from longest to shortest for the simplified rainbow shown here, or choose any five colors. This is a decorative five-color version, not a complete diagram of rainbow colors. Light paper curves more easily than thick card; very soft tissue paper will not hold the arches well.
Fold the feet before bending
On every strip, measure 2 centimeters from each end. Fold those short end sections outward to make two flat feet. The middle section should curve upward between them. Press each crease firmly with a fingertip so the foot sits flat on the base.
Do not fold the middle into a sharp peak. Gently draw the strip through your fingers to encourage a curve. If a crease appears, that is fine: the sculpture can have a pointed arch. The goal is a stable shape rather than a perfectly smooth display piece.
Build from the smallest arch outward
Place the shortest strip near the center of the cardboard. Move its two feet until the arch stands comfortably, leaving roughly 6 centimeters between the two folds. Glue both feet down and hold them briefly. Let this first arch become secure before surrounding it with longer strips.
Add the next shortest strip over the first, placing its feet just outside the first pair. Continue outward one strip at a time. Check from the front that you can see a gap between neighboring arches. You may need to move the feet slightly farther apart as the strips get longer.
Fix leaning and flattened arches
If an arch leans sideways, compare the two folded feet. They should be similar lengths and sit flat. Reposition the loose side before the glue sets. If the whole sculpture tips, use a wider base rather than making the paper strips heavier.
If a tall strip collapses onto the one beneath it, bring its feet a little closer together or use slightly firmer paper. If an arch is too tight to fit over its neighbor, spread its feet or choose a longer strip. Avoid forcing every foot onto the same spot; the arches need room to nest.
Turn the finished rainbow into a scene
Add a drawing of a garden, town or imaginary landscape on the base. Keep extra paper decorations low so they do not pull the arches sideways. A child can describe who travels under the rainbow, or make a small paper character to stand beside it.
For a group, prepare one set of five strips per child and label the sets with their lengths. Leave one assembled example available without requiring copies. Try paper weaving next if the strip work was enjoyable, or use leftover paper for a mosaic collage.